Banners
What's in this article
- Managing Your Site's Banners
- Adding a Banner
- Adding a Google AdSense or DoubleClick for Small Business Banner
- Modifying the Placement of Banners
- Customizing the Banners for a Specific Page
Banners are a form of advertising that consists of small, medium or large images that are displayed throughout a website. ShoutCMS provides a central location for you to configure your banners, decide where they should be placed, and track how many times they have been clicked.
The following image describes where banners can be placed on a ShoutCMS site. Use this as a guide when deciding how to configure your banners:

Note
Banners can be uploaded in two max widths. A maximum of 960 pixels wide for Banners in Position 1 and 7; and a maximum of 235 pixels wide for Banners in Positions 2 through 6.
Managing Your Site's Banners
To access the Banner Management screen, hover your mouse over the top navigation icon titled "Website" and click on "Banners":

- Add a new banner to the site.
- Add a new Google AdSense banner to the site.
- Add a new Google DoubleClick for Small Business banner to the site.
- Configure the placement of banners that have been added.
- Modify the selected banner.
- Delete the selected banner.
Adding a Banner

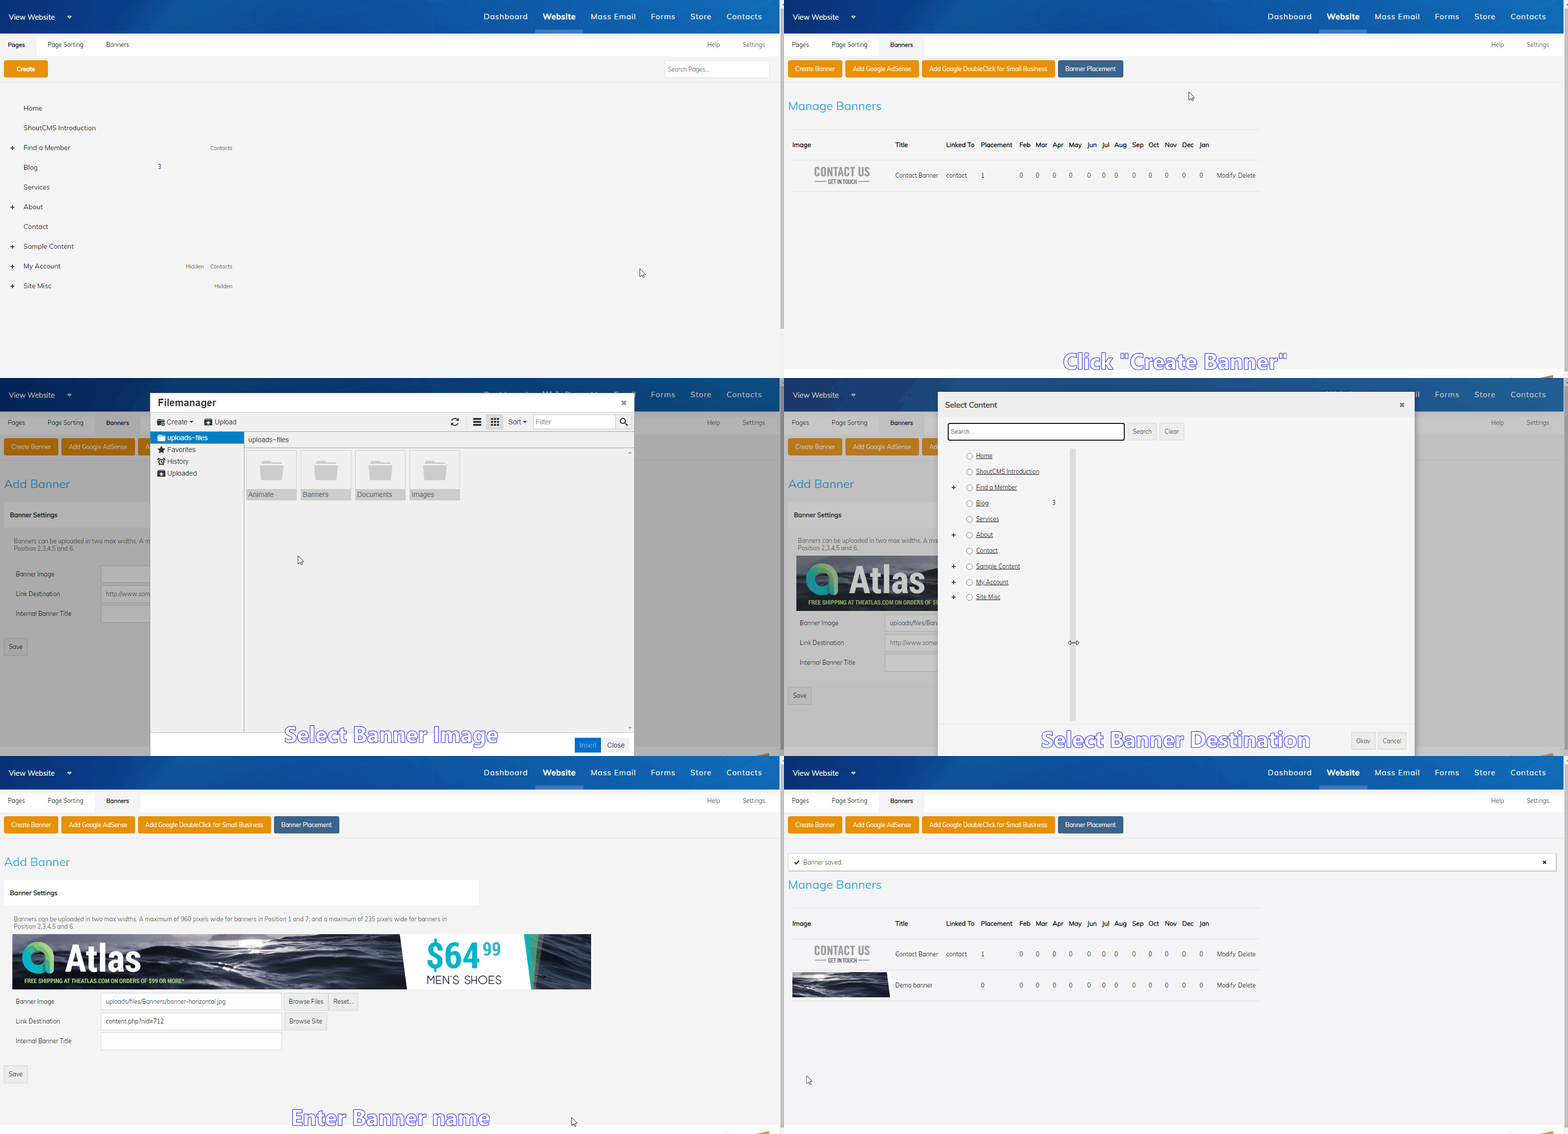
- Hover your mouse over the top navigation icon titled "Website" and click on "Banners".
- Click "Add Banner" (#1 above).
- Click on "Browse Files" to select the image to use for this Banner.
- Enter the URL that visitors will be taken to when they click on the Banner, or click "Browse Site" to select a Page from your own site.
- Enter a user-friendly name to refer to this Banner.
- Click "Save".
Note
Your banner will not be visible until you select a placement.
Adding a Google AdSense or DoubleClick for Small Business Banner
After signing up for an AdSense or DoubleClick account with Google, you can embed ads from those services into your site:
- Hover your mouse over the top navigation icon titled "Website" and click on "Banners".
- Click "Add Google AdSense" or "Add Google DoubleClick for Small Business" (#2 or #3 above).
- Enter the details from your Google AdSense or DoubleClick account and a title/name for the banner.
- Click "Save".
Modifying the Placement of Banners

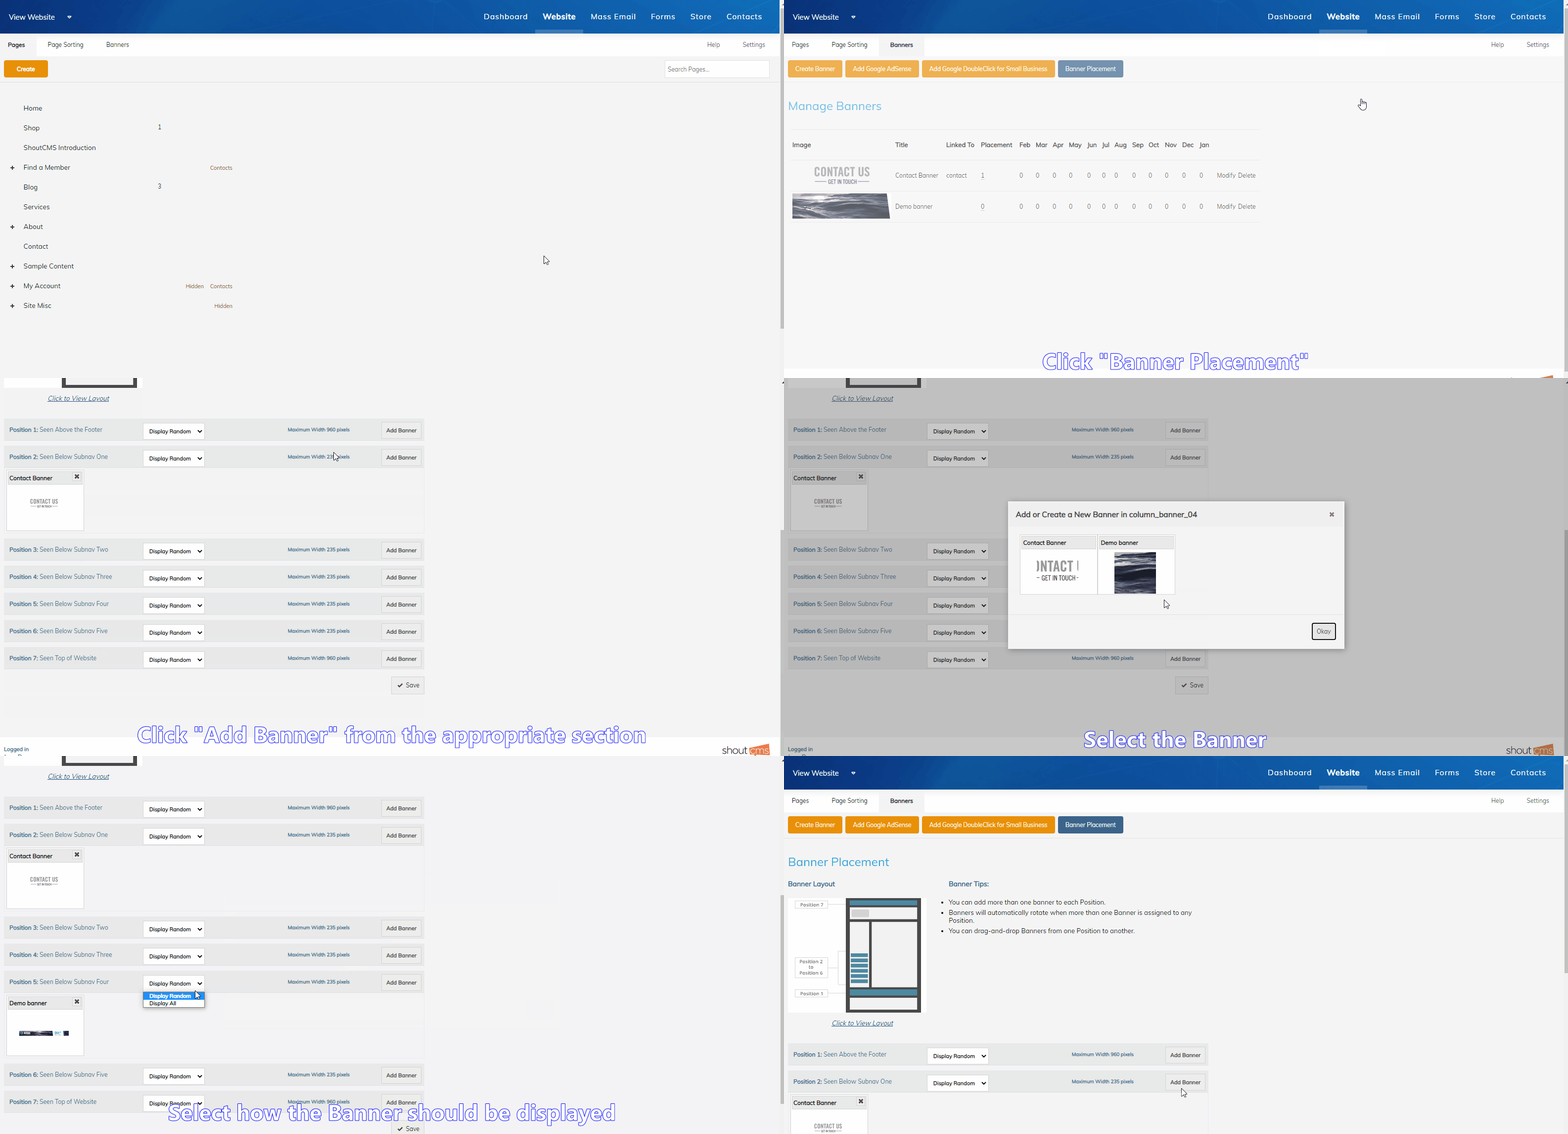
- Hover your mouse over the top navigation icon titled "Website" and click on "Banners".
- Click "Banner Placement" (#4 above) to choose where the banner should be displayed.
- Click "Add Banner" for the position that will contain the banner.
- Click on the banner you want to display.
- Select how the Banner should be displayed:
Display All: Show all banners for this position in order.
Display Random: Show only one of the banners for this position. The banner will be chosen randomly each time the page is loaded. - Click "Save".
Customizing the Banners for a Specific Page
Pages can be set to use their own banner settings, instead of the global settings, in the Page Options area.
Note
The Home Page must use the global banner configuration. Page-level settings are not available for that Page.
